

I can't say I'm an expert when it comes to bread making, but at least there are a few that I know how to make pretty well, and this is one of them. I love the process of making bread. It takes a long time (as if it's testing your patience), but it's quite rewarding. You really get to see and feel the changes in the dough and appreciate the art of it. Not to mention when the bread is ready to come out of the oven, it makes your house smell like a professional bakery!

(閱讀中文請看續文)
Here in Quebec, bread is an important part of the diet, just like in France. There are plenty of bakeries, and as good as some of them are, I still think it's not quite the same as baking it yourself, because you get to choose whatever kind of loaf you'd like to make. I like to be in control of the ingredients I put in the bread, such as avoiding bleached flour and white sugar, or using more whole wheat flour and nuts, etc. Some bakeries add preservatives or chemicals to make their bread last longer and rise better, and because of that, they tend to have very different texture and taste than homemade bread.

The
recipe I'm going to share with you, I've made several times for
friends, and I've been getting some recipe requests for it lately. I
use a mixer. (If you happen to have one, it makes your life a whole
lot easier.) Even though I add some whole wheat pastry flour, which
is a little denser, the bread is still light and fluffy. The best
part is the chocolate flavor (one benefit of using high quality
bittersweet chocolate). It really makes a difference when you use
high quality chocolate and cocoa powder. If you know any chocoholics,
like some of my friends, I guarantee you that they would happily
receive this homemade bread from you over and over again!

Bittersweet
Chocolate Bread
A: 180 g bread flour
80
g whole wheat pastry flour
40
g all-purpose flour
25
g light brown sugar
10
g cocoa powder
3
g salt
B: 150
g lukewarm milk (about 105ºF/41ºC )
25
g maple syrup or sugar
8
g active dry yeast
2
T cream
45
g dark chocolate chips or pieces
egg,
beaten 45 g (less than 1 egg)
C: 25 g coconut oil, room temperature
15
g unsalted butter, room temperature
D:
30 g walnuts, chopped
25
g dried cranberries
more
unsalted butter (about 1 T) to finish the bread, cut
into 1/4 inch wide long pieces
1.
Place ingredients A in the mixer bowl.
2.
Mix ingredients B together in a small bowl and let sit for at
least 10 minutes.

3.
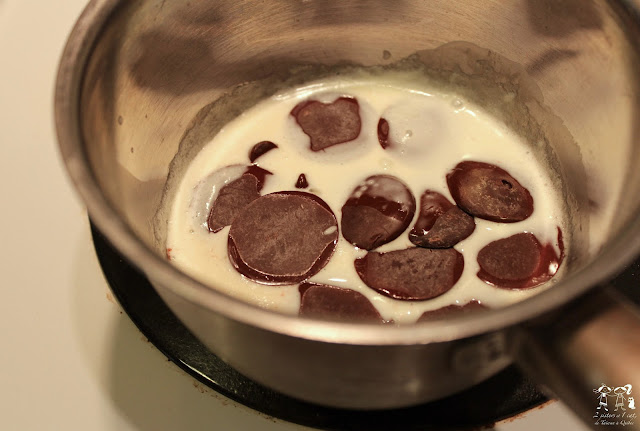
Heat the cream in a small pot until just hot, but not bubbling. Turn
off the heat and add the dark chocolate pieces, then let sit for 5
minutes. Stir the cream and chocolate mixture with a small
whisk and mix well.

4. Add B, the chocolate sauce, and egg to the the mixer bowl with A.

4. Add B, the chocolate sauce, and egg to the the mixer bowl with A.
5.
Turn on the mixer and mix at a low speed. *It will look a little dry
in the beginning, but give it a minute. If it's still very dry and
the dough is not coming together, add a little of water.

6.
When the dough starts to come together, add C in the mixer.
Slowly bring the speed up to medium and let it mix for about 10
minutes or until the dough is very smooth and shiny.
7.
Take the dough out of the mixer and incorporate with the ingredients
D, then shape it round and
place in a large closed and oiled container. Let it proof in a warm
place for about 60-90 minutes, until the size is double.

8.
Scoop out the risen dough onto a cleaned surface. Gently press the
dough down to release the gas. Divide the dough into 6 even pieces.
Shape each piece into a round. Cover them with a damp cloth and let
rest for 15 minutes.

9.
Remove the cloth. Roll each ball with a rolling pin into about 5 inch
long oval shape. Fold the two long sides under, then roll and shape
with your palms into a mini log, about 6 inches long.

10.
Place all the logs on the baking tray. Cover them with a damp cloth
and let rise again in a warm place for about 30-45 minutes until they
double in size.
11.
Preheat the oven to 180ºC/350ºF. Remove the damp cloth.
With a small paring knife, gently score the surface of the bread to
make a lengthwise incision down the center. Line the butter pieces on
top of the score mark.

12.
Place the bread on the middle rack in the oven and bake for 15-20
minutes. Remove from oven, let cool on a rack and serve.

若要自稱做麵包達人,是不怎麼敢當..
但至少也算拿手,還端得出幾個代表作的麵包!
(撥留海)
因為麵包需要發酵的關係,製做過程往往要花上好幾個小時,簡直是在考驗一個人的耐性!
但我還是很喜歡在這個等待過程中所看到及感受到的麵糰變化,尤其是當麵包從烤箱出爐的模門特,濃郁的麵包香立刻充斥整間房子,尤如那些專業麵包店一樣,令我一整個好有成就感啊!
(轉圈)

在充滿法國文化的魁北克,麵包算是飲食中相當重要的一個角色。這裡好吃的麵包店相當多,但不管再怎麼好吃,跟自己親手做的就是不一樣。自己做麵包可以決定口味及種類(就像今天要介紹給大家的) ,也可以控制糖份,更可以盡情的添加自己最愛的健康食材,如全麥粉、堅果..等等,以及排擠不得我緣的白糖..哈哈哈。有些黑心麵包店,為了延長麵包保存期限,讓麵包質感更鬆軟,會額外添加防腐劑或不知名化學物質,非常不健康!

今天分享的這個麵包,麵糰是用攪拌器攪打好的,很輕鬆不難。我雖然添加了一些全麥麵粉,但麵包鬆軟度依舊百分百喔! 其中,最與眾不同的點是,獨家的濃郁苦甜巧克力口味!! (尖叫) 我幫幾個喜愛巧克力的捧油們做過幾次,都深受好評,從此每天在我家門口站岡用史瑞克裡長靴貓的眼神央求我再做給他們吃,again and again.. and....... again。(好啦~ 這段有點豪洨,請自行跳過XD) 總之,若你的家人或捧油也是巧克力重度粉絲,這款麵包將會是很好的自製禮物喔!
(特別感謝老妹的中文版編輯!)

苦甜巧克力麵包
10. 蓋上溼布後放置溫暖處再發酵約30-45分至漲大。


 Left: With a small paring knife, gently score the surface of the bread to
make a lengthwise incision down the center
Left: With a small paring knife, gently score the surface of the bread to
make a lengthwise incision down the center
Right: Line the butter pieces on top of the score mark


在充滿法國文化的魁北克,麵包算是飲食中相當重要的一個角色。這裡好吃的麵包店相當多,但不管再怎麼好吃,跟自己親手做的就是不一樣。自己做麵包可以決定口味及種類(就像今天要介紹給大家的) ,也可以控制糖份,更可以盡情的添加自己最愛的健康食材,如全麥粉、堅果..等等,以及排擠不得我緣的白糖..哈哈哈。有些黑心麵包店,為了延長麵包保存期限,讓麵包質感更鬆軟,會額外添加防腐劑或不知名化學物質,非常不健康!

今天分享的這個麵包,麵糰是用攪拌器攪打好的,很輕鬆不難。我雖然添加了一些全麥麵粉,但麵包鬆軟度依舊百分百喔! 其中,最與眾不同的點是,獨家的濃郁苦甜巧克力口味!! (尖叫) 我幫幾個喜愛巧克力的捧油們做過幾次,都深受好評,從此每天在我家門口站岡用史瑞克裡長靴貓的眼神央求我再做給他們吃,again and again.. and....... again。(好啦~ 這段有點豪洨,請自行跳過XD) 總之,若你的家人或捧油也是巧克力重度粉絲,這款麵包將會是很好的自製禮物喔!
(特別感謝老妹的中文版編輯!)


苦甜巧克力麵包
A: 高筋麵粉
180公克
中筋麵粉
40公克
可可粉
10公克
紅糖
25公克
鹽
3公克
B: 微溫的牛奶
150公克
楓糖或白糖
25公克
一般乾酵母
8公克
苦甜巧克力碎塊或粒
45公克
蛋
(打散)
45公克
C:
椰子油 25公克
*若冰在冰箱,要先回溫
回溫無鹽奶油
15公克
D:
切碎核桃
30公克
無鹽奶油 15公克
切成小細條
1.
將A料一起放入攪拌容器內。
2.
將B料放在一個小容器內,攪拌均勻後放置10分鐘。
3.
在小鍋中倒入鮮奶油,加熱後立即熄火,倒入巧克力碎塊放置5分鐘後拌均勻。
4.
將B料,蛋和拌好的巧克力醬加入A料。
6.
當所有材料攪成一個麵團時,加入C,慢慢的增加到中速,讓它攪拌10分鐘或到表面光滑不沾手為止。
7.
把麵團從容器拿出來,加入D料均勻揉入後將光滑面揉滾圓,收口處朝下放入一個有抹油的大容器密封,放置在溫暖的地方發酵1至1個半小時或直到漲大兩倍後拿出。
8. 將麵團從容器取出,放置乾淨的桌面,用手輕輕的壓下以將麵團裡的空氣擠出來,平均分成6等份,再將每一等份揉成圓狀,蓋上溼布休息15分鐘。
9.拿掉溼布,將每一個小麵團用桿麵棍桿成約12-13cm長的橢圓形,翻面後用手滾捲成約15cm長的橄欖形再放進烤盤內。
10. 蓋上溼布後放置溫暖處再發酵約30-45分至漲大。
12.
放入烤箱中層烘烤15-18分鐘。在鐵架上放涼後即可食用。


I used both coconut oil and unsalted butter, but you can use all butter instead if you can't find any coconut oil


Add ingredients C only after the dough starts to come together
所有材料攪成一個麵團之後再加入C 料


左圖:用小刀輕輕的在表面劃一道很淺的裂痕
Right: Line the butter pieces on top of the score mark
右圖: 在裂痕處放上切成細條的奶油


1 comment:
Thanks for the recipe! I know someone who's gonna love this bread. The drawings are a nice touch.
Post a Comment